These instructions also apply to the S controller as well. I have not done the jewel mod on an S controller myself, but the wiring and the concept are identical
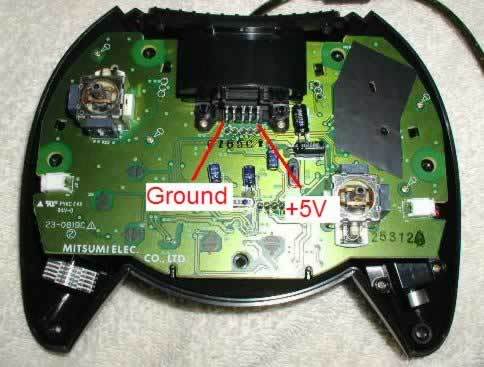
These are the points to solder to. They are right at the base of the memory card slot. The far left pin is the ground and the far right is the +5V
Click here for instuctions on how to remove the front cover
Step 1 :Cut away the backing under the dome using a dremel tool. You only have to cut away the area that the light will show through.


This is what I will use to replace the stock disc. I had some custom stickers made at a local sign shop using the stock disc as a template.
Step 2 : Put the replacement disc onto the milled out controller and check to make sure it lights up the way you like.
EX.

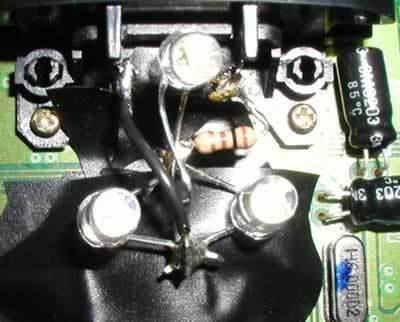
The picture is complicated, but it shows how the LEDs are soldered. A 100 ohm resistor is soldered to the +5v pin. Solder the + side of all three LEDs to the 100 ohm resistor, and the ground of all three to the ground. I got creative with my soldering and soldered the LEDs together away from the controller and then dropped the completed unit into the controller. Make sure to cover up the board and other memory card pins with electrical tape to make sure nothing shorts out. I used 5mm 5V, 300mcd, 30mA LEDs from Radio Shack.
______________________________________________________________________________________________________________________________________________
Step 3 : Enjoy